Party Like the Muse: Ballerina Place Settings
This series is so near and dear to my heart. Party Like the Muse is such a big thought in my mind and it has a clear direction. I’m happy to make time for it on a monthly basis. I got a ton of feedback but after falling in love with a paper plate (yes that happens lol) I knew I had to make this my next installment. This Ballerina place setting is totally dreams realized!!! The plate that I chose to use grabbed me by the heart as soon as I laid eyes on it.
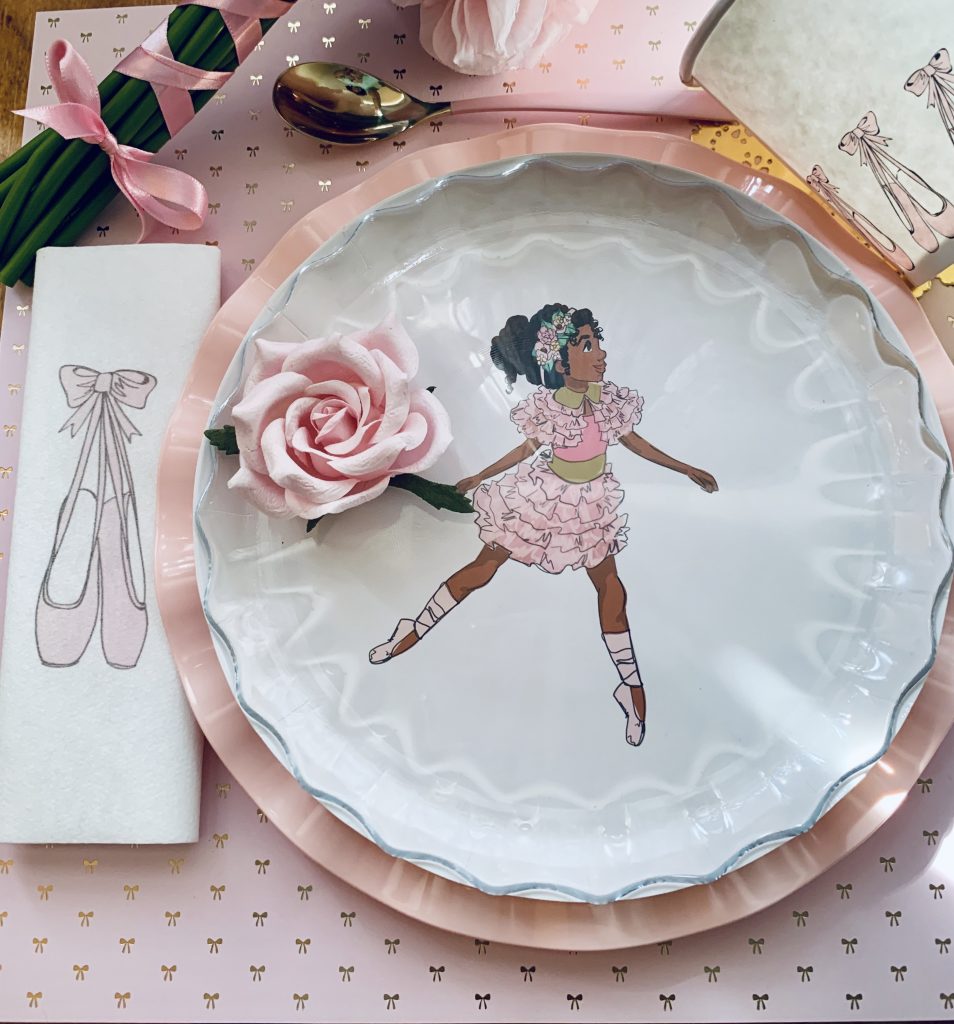
Representation is not something I talk about often but I certainly think about it often as it affects my life on a daily basis. In the party world there are seriously a ton of ways and places where certain cultures are under represented. Finding party goods and decorations with beautiful depictions of kids of color is as the kids say – “not a thing”. It’s honestly like finding needle in a haystack. This is why when I came across Anna Pookie’s website, I knew I had to use something from her collection. I scrolled through and was delighted to see OPTIONS! Because once the representation happens, you better believe you usually have 1 choice. There are gorgeous plates and party goods on her site with beautiful little brown girls dancing, and swimming, and twirling. All of them are gorgeous, you cannot choose just 1 but the ballerina reminded me of my own little girl so I purchased her….30 of her!
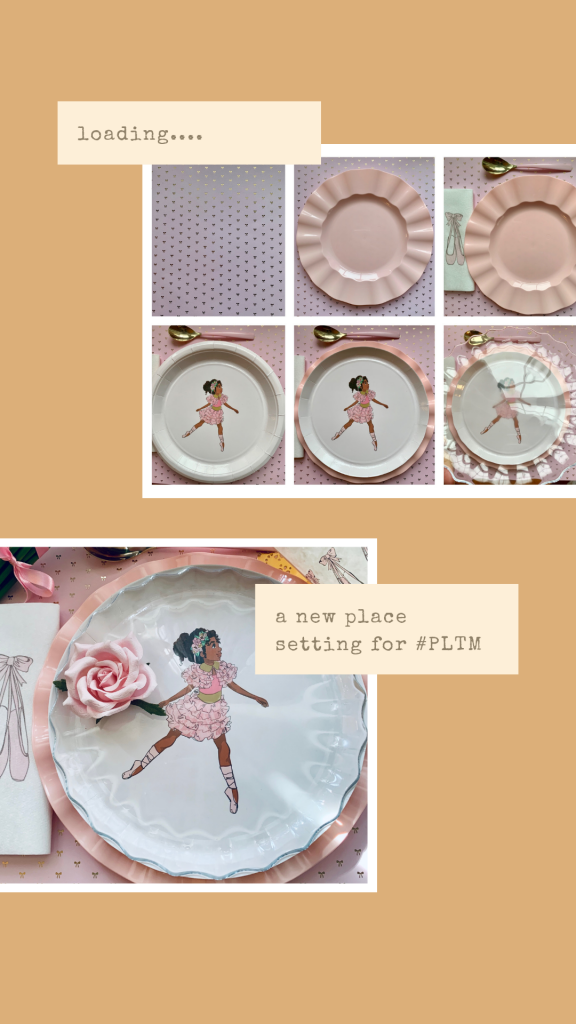
Remember with Party Like the Muse, I’m teaching you how create a gorgeous place setting for your little ones parties. These will be getting better and better as we go along. I think you’ll find that this one is better than the first one because I’m showing you step by step so you can see the process. Here we go….please drop a line and let me know your thoughts.
Ballerina Place Settings
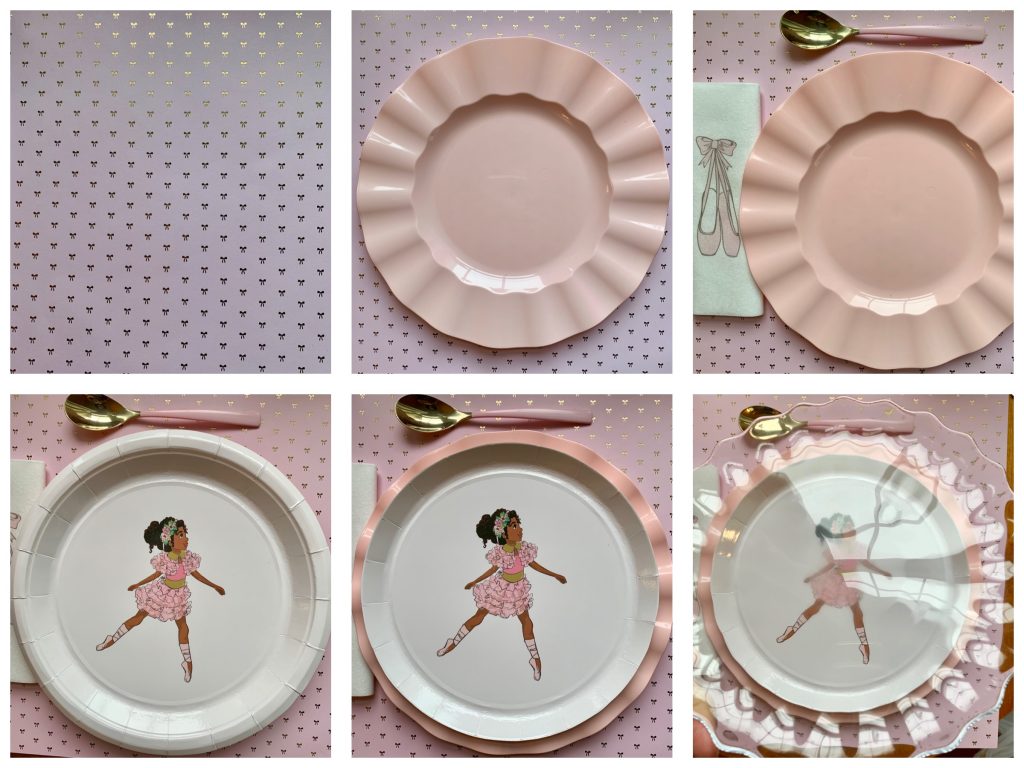
Step 1 – Find an awesome placemat paper. I used a really cute gold foil bow pattern paper from Michaels.
Step 2 – Put down your bottom layer plate. These plates I usually use are dinner sized but since this is kids, I always use lunch size plates. No larger than 9″.
Step 3 – Add in the napkin and cups that match your theme. I loved the entire collection so the cups and napkins are also from Anna Pookie.
Step 4 – Do a circular cut around the edge line of your plate.
Step 5 – Layer your cake plate on top of your dinner plate.
Step 6 – For elegance, add a clear salad plate to the top of your place setting. This one I have with the ruffled edge is $1.99 from Ikea!
Remember this Ballet Party we did?
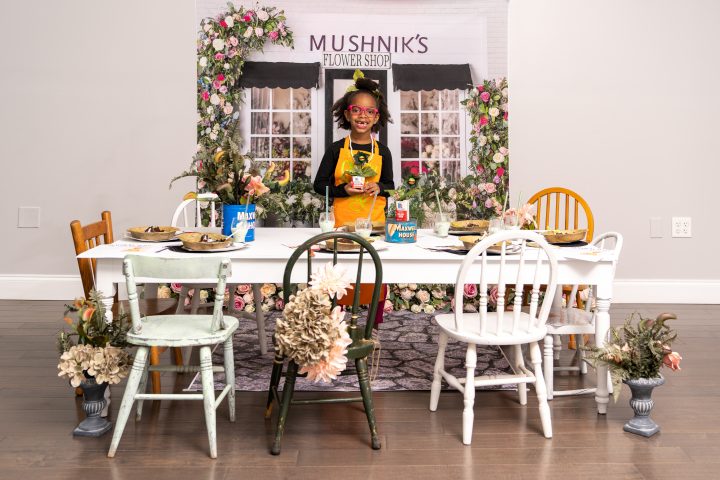
